I managed to get enough time to paint the turntable this week.
Saturday, July 2, 2011
Saturday, June 25, 2011
Good Buy!
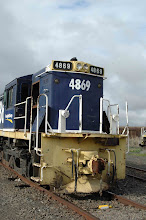
Caught up with an old friend at the Toowoomba exhibition whom I hadn't seen in a while. Lucky I did as he offered me a Auscision B class in VR blue and gold for $150! It didn't take long to realise that was a great deal. I would have preferred a Tangerine and grey but for that price I ain't complaining. So straight to the weathering bench...... One problem, I moved house and my bench is in 20 pieces on the floor of the new shed. So a makeshift bench was found to achieve this.
A light dusting on the roof to knock back the new shine.
A touch of gloss back with a brush to simulate spilt diesel and oil on the tank and oil from the engine or exhaust out of the engine bay. I also touched up the bearing areas on the bogie's, not shown in this picture.
A view of the other side. As I am not that old and don't live in Victoria, I find it great to use the Train Hobby publication books to find pictures of Locos and select the condition/state I want to reproduce.
Sunday, June 19, 2011
Prototypicaly Delcious!
It was my eldest boys 4th birthday today so I decided to put to use my modelling skills.
No styrene, timber or brass wire here just lamingtons and heaps of lollies!
Tuesday, June 14, 2011
Never too sick to model!
Had a sick day today to help look after the kids which are all sick plus fighting a cold myself. So between taking one to and from Kindy and the others to the doctor I managed to spare a little time for myself. So what better to do than build another turntable. I was reading that the 60ft turntables were very predominate so I better have one of those too.
Nearly complete model. Not sure what I want to use for the flooring, options are sheet styrene or that plastic packing strip. I've seen it used in the past so I'll have to get some tomorrow at work to check the thickness and realism.
Monday, June 13, 2011
A Miserable Long weekend.
Due to the miserable weather here this weekend there was nothing to do but put some time into modelling. I've been wanting to build a turntable for some time now so I gathered up the research info I have and got right into it. I decided to build a 50 ft turntable as one day I hope to build a layout which incorporates a branch line with a terminus, therefore I need a turntable to spin those old steamers round or maybe just have it sitting around unused as I mostly run diesels.

Side on shot of the model, only requiring the rails.
Due to the weather painting was not an option, it will have to wait for another day.
Another view from the turn assist handle.

I cut the sides from a sheet of .20 styrene. Then added all the strengthening beams for the sides. Because evergreen don't make a 'T' in styrene it was all made up from strip styrene, very time consuming but worth it.

Top view of the two sides together with strengthening cross members. I added a little extra styrene on the insides for strength and to assist with the squareness. It will be hidden with the top member which the rail attaches to.

I chose to use scale timber for the walkways as I wanted to model a realistic look and effect. It would have been stronger with styrene but due to the amount of use it will get I think the timber is a better option.

I went with styrene for the hand rails as a strength option, plus they are usually painted white so it will nearly be unnoticed. I also left the pinion cover until I can decide on a method to have the turntable rotate and power the rails.

I cut the sides from a sheet of .20 styrene. Then added all the strengthening beams for the sides. Because evergreen don't make a 'T' in styrene it was all made up from strip styrene, very time consuming but worth it.

Top view of the two sides together with strengthening cross members. I added a little extra styrene on the insides for strength and to assist with the squareness. It will be hidden with the top member which the rail attaches to.

I chose to use scale timber for the walkways as I wanted to model a realistic look and effect. It would have been stronger with styrene but due to the amount of use it will get I think the timber is a better option.

I went with styrene for the hand rails as a strength option, plus they are usually painted white so it will nearly be unnoticed. I also left the pinion cover until I can decide on a method to have the turntable rotate and power the rails.
Sunday, April 10, 2011
S is for sleepers?
As usual with my latest run of modelling there were a couple of lazy S trucks in the box of
"I don't model that era but I got it cheap!"
So when I came across some pictures of S trucks used in sleeper traffic I remembered my hidden treasures and found good use for them which brings them into my era. Better still they are way and works, which interests me due to individuality.
I cut a piece of balsa wood to shape of the the inside of the wagon. I scribed the sleeper width and put in notches to make it look as though the sleepers had not been cut to square.
I painted it brown and dry brushed it with a deep orange colour to give the impression of the clean grain from cutting and that they had weathered a lot from the time they were sawn to the day of pick up.
Individual sleepers were then cut from scale lumber. They will be applied to the top of the balsa pile. Again painted in the same manner as the balsa. The Balsa load installed in the wagon. It isn't glued in so it can be removed if needed.
Top view.
SW 13288 with the individual sleepers glued in with white glue. After gluing them in I gave them a little extra streaking for appearance.

WS 1440 with it's sleepers fully loaded. So which is correct WS or SW?
Perhaps the decal applier was dyslexic? Oh yes almost forgot, I did paint the wagon and had the decals made by a mate form the pictures found.
The two wagons "hooked up". I tried to make the top row of sleepers look as though they had dislodged or moved during transport. Then again it might have been 350pm on Friday afternoon.
Thursday, March 17, 2011
Shunters wagon.
I have had a set of Columbia models NOFF ore hoppers for a while now which were part of a collection I purchased. Not being a fan of the wagon they sat in the shed for months until a mate gave me an idea. On one of his many trips into NSW photographing trains he showed me a picture of a converted NOFF into a shunters wagon. So me being always on the look out for a new challenge and some individuality I had a go at representing the wagon.
The first panel removed with the gas axe.
Subscribe to:
Posts (Atom)


Lastly a coat of