Friday, December 30, 2011

Paint 'n' stuff.

I got around to putting paint on the projects from the last post.


The crane, shed and one of the six buffer stops.


View from another angle.


The crane was only painted 3/4 of the way on the base as it will be buried half way on the layout. The photos don't do it any justice.


View from the rear. A little disappointed with the weathering on the shed, I think it is a little heavier than I was hoping.


Final shot, enjoy.

Sunday, December 11, 2011

Scratchin' up a few things!

Here are a few bits and pieces I have been putting together for the "Boggabilla" end of the layout. Now I am not trying to recreate Boggabilla, so before someone pulls me up for inaccuracy, I am only modelling the aspects of the NSW railways that I like and scaling them to suit my available space.


The goods shed that will go in place on the Bogga goods siding. The idea behind the different length legs is to bury the long legs in for stability and the shorts will be at ground level.


A little scene showing the buffers goods shed and yard crane. The crane is a Uneek kit.


Same scene from a different angle.


A closer view of the crane. I cheated and super glued this one together as I couldn't find my low melt solder.


The coal stage I made over the wet weekend. Again not to scale length as I don't have the room or think that Bogga has the need for a 100 foot coal stage!


The hole in the end is due to running out of styrene, so I used the scraps. I will make this look as though something has fallen into the stage and broken the timber.


View from underneath the stage.
All they need is a little paint and they will do the trick.

Tuesday, November 1, 2011

Got the track!

The post man arrived after lunch today containing my order of track from Tom's. Thankfully I was having a day off work so I was able to get straight into laying it. The 2 pictures below are the afternoons progress. Plus I have added how to make points Dcc friendly.


The view from the terminus.


The opposite end.


Now I am not sure how many of you are aware how to make a point DCC friendly so I thought I would show you the process I am using. It is not my creation but something I found on the Internet and I thought I would pass it on. This is only relevant if you are using electro frog points. The points I am using are Peco.


Firstly you need to remove these jumper wires, indicated by the arrows. This isolates the frog area from the rest of the rails.


This can be done with a screw driver inserted into the gap, then twisted. The little jumpers just crack off.


One jumper has been removed. Remember to do both before installing your point.


Peco have kindly cut and insulated the rails for you. (The jumpers connected these two rails underneath)


They have also been kind enough to provide a small wire which joins all the rails in the frog area. You just need to extend this wire and install it into a single throw switch. It will need to be connected as to provide the correct polarity to the frog area depending on the position of the point.


The above schematic shows the wiring diagram to the frogs when the point is thrown. (click on the picture to read the text) I realise that I have coloured the bottom throw rail black when it should be red, only the frog changes colour/polarity, see next diagram.


The point thrown in the opposite direction. Note the polarity change on the frog.


You also need to connect the two rails on the either side of the point to give the throw rails the same polarity as the rails they are thrown against.


Hope this is of help.

Tuesday, October 25, 2011

Cork's down

I've been doing a bit of travel with work lately, so not much has been getting done on the layout.

Fortunately I got home early Friday morning form a trip which gave me the day off, so the keenness kicked in and I managed to finish off the baseboard, then get a coat of paint in late Friday afternoon. Saturday saw some more free time, so with the paint dry I took the chance to get the cork down. Sunday saw babysitting duties but that didn't hold me back... while I wasn't getting food, changing nappies, mowing the lawn or entertaining the kids I managed to finish the job. I even managed to get some polystyrene down before the end of the day. So while I wait for my track to arrive from Tom's, I have been focusing on the buildings around the layout.........but that will have to be another post.


The view form the terminus.

The station will be on the left with the good shed to the right. This area is now covered with polystyrene.


The opposite end of the terminus looking across to the grain terminal.

Again this area has had Styrofoam laid.


The view from the end of the grain terminal showing the gravity loader on the left, sweeping around to the bridge on the right.


The view looking back towards the bridge. There will be a station in the top right corner, more a passing loop than anything else. This area will be have a large mountain to the right, so the trains will wind there way around the hill.


Looking back over to the area where the last shoot was taken. To the right of this photo is the other station. It is hoped to be a main station prior to becoming a branch line.

Monday, September 26, 2011

The Weekends Progress.

I was given the go ahead after lunch to the return to the shed on Saturday, so there was no stopping me! Below are some pictures of that progress over the weekend and how my construction method looks.


I used the templates you can download from Peco's site to plan my track work. After doing this I measured 35mm either side from centre, as that is the width of timber I am using for my risers, then cut with a circular saw.


The view from the Sydney end showing the cuts in the baseboard.


The risers nailed in place. I started about 20mm above the base board and kept it level through to the turntable and coal road. The road to Sydney has a slight grade in it. The theory here is to get the sound on the engines working hard as they exit the station.


The terminus showing the poly styrene that will fill the gap and allow me to carve the scenery below rail level. At this stage this yard will be quite flat. The plan is to get the track up at least 100-150 mm to get some real terrain in closer to the centre and the other end.


A over all view of the weekends accomplishments. The risers in the background are already at 50 mm above the baseboard.


The view from the turntable end. The turntable road is the short road in the centre. I hope to install the table into a pit.


To keep with true branchline status I intentionally nailed some risers low to give that undulation look in the rail. This is obvious in the picture as you can see the track bowing under the straight edge of the spirit level. I am also trying not to be to anal with the level as I don't want perfect track work. The only place I am trying to keep flat is the sidings, this is to prevent runaway wagons.


Saturday, September 17, 2011

The construction begins

After not doing any travel for work in the last three weeks, I got a little stir crazy and decided it was time to clean out my shed since moving to the new house.


It all started out good until I thought I would duck down to Mitre 10 and have a look at prices on timber. Well I didn't know you could get non structural timber (35x75x2410) for $3 a length. The visit ended with me purchasing 25 lengths of timber, 3 packing sheets of MDF ($5 each) and a nail gun. Below is the end result of working a couple of hours each night after work. I guess you could say I got a little excited as the bench work was up within the first week. I also found that using the nail gun instead of screws sped up the process massively.


The layout has no track plan at this stage, just ideas of what I like about branch lines. Being that it is based on a branch line code 75 Peco will be used. To better represent a branch line I will pop out a few sleepers here and there, and try not to lay it too straight.


The decision to use peco over hand laid was easy as I have a friend doing hand laid and it is taking far too long to get operational and the points can be a little unreliable, also I want to enjoy my layout before I die. I love the look of hand laid track but the time saved on track work can be put into the scenery and if I put enough work into the scenery no one will notice the track.


The track will have grades in it and be roughly laid as a branch line would be. So the idea is to put the ply down on the base trace out where the track will be and cut out with a jigsaw. Then raise the track above the base at least 100mm to begin with then fill out with foam and shape.


The intended era will be prior to the demise of the branch lines. So most trains will be short and of the 4 wheel variety. Large grain trains will serve the silos and ballast trains the quarry. The stations will be derelict and overgrown.


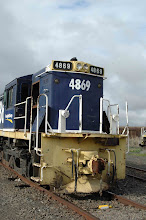
The above photo is the terminus (44 class). It is based loosely on Boggabilla.


This section of track will be a grain complex. Boggabilla is in the background on the right.


Just a corner module. It will probably have a small passing loop before it with a PC1. A bridge will be on the short straight to the left.


Another straight section and corner module. I will put a quarry loader on the straight section to serve ballast trains.


The other end. For now it will be a terminus. The whole layout has been constructed with dismantling in mind. In future when we move to the "dream house" this end will come directly off a helix and the whole layout will be the top layer. The lower level will be a double tracked loop to run large trains. But for now I am taking small bites and building the layout in stages.

Saturday, July 2, 2011

You spin me right round baby......

I managed to get enough time to paint the turntable this week.


The finished product.


The steps to painting. Undercoat grey first for better paint adhesion and a good base colour.


Next a blue grey mixture


Then some areas are lightly covered with grey to depict faded paint.


Closer view.


Next a dusting of rust on the underframe.


Using a paint brush I painted the walkways with a brown grey mixture.


When gluing on the rails I used 3 sleepers close together to maintain the gauge rather than trying to measure it.

Saturday, June 25, 2011

Good Buy!

Caught up with an old friend at the Toowoomba exhibition whom I hadn't seen in a while. Lucky I did as he offered me a Auscision B class in VR blue and gold for $150! It didn't take long to realise that was a great deal. I would have preferred a Tangerine and grey but for that price I ain't complaining. So straight to the weathering bench...... One problem, I moved house and my bench is in 20 pieces on the floor of the new shed. So a makeshift bench was found to achieve this.


Firstly a spray of grimey black around the bogie's, lower section of the loco and the roof area.


A light dusting on the roof to knock back the new shine.


A touch of gloss back with a brush to simulate spilt diesel and oil on the tank and oil from the engine or exhaust out of the engine bay. I also touched up the bearing areas on the bogie's, not shown in this picture.


A view of the other side. As I am not that old and don't live in Victoria, I find it great to use the Train Hobby publication books to find pictures of Locos and select the condition/state I want to reproduce.


Then a spray of rust/mud to simulate road grime on lower areas.


The other side view of the Loco.


A view from the nose.


Lastly a coat of dull coat to knock back any remaining shine and seal on the weathering to prevent fingers wiping it off when removing and replacing it in the box.